Esri provides a comprehensive suite ofgeoprocessing toolsthat we use to run spatial analysis and manage our GIS data. Depending on your workflow, you may use the same tools over and over again on a daily basis. However, have you ever wished you could have one tool that would streamline your workflow? With script tools in ArcGIS Pro, you can set up parameters and automate complex workflows or package routine tasks into one interface!
In ArcGIS Pro, we createcustom script toolsto streamline clients’ workflows to make their day-to-day lives easier. For one of our clients, Laura Emerson, a senior data manager atExpress Mapping, we created a couple of custom scripts to help her daily workflow. Express Mapping is a data-driven company that focuses on the creation of radius maps and property owner-occupant lists. They combine data analytics and GIS mapping to help their customers meet public notification requirements for local permit requirements.
In this article, we will show you how powerful custom script tools are and how to set them up in ArcGIS Pro!
Script Tool Demo video
This custom script tool demonstration you are about to watch has twelve parameters set in the code and utilizes a variety of tools!
This is one of the five custom script tools running.
“Since our first script, we have built upon their tools each year to continue improving workflow. Recently, we switched from ArcMap to ArcPro. Having Geo Jobe involved in the transition of our scripts to the new environment facilitated everything. We now have more options in ArcPro and have started exploring report scripting.”
– Laura Emerson
As you can see, there are several script tools in the Pro Project but this one script tool created new features by selections, buffered, created a layout based on the parameters, and more. This automated tool was one of the first scripts GEO Jobe built for Laura to help automate her workflow.
Do you have a stand-alone script you want to integrate into your ArcGIS Pro? Well, let’s get building!
How to create a Toolbox in Pro
You will need to firstcreate a toolbox (.atbx)in ArcGIS Pro before setting up your script tools. Open your ArcGIS Pro Project and follow the steps below:Navigate toCatalogandright-click Toolboxes. SelectNew Toolbox (.atbx), name your toolbox something short and sweet that gives an idea of how your tools will be used. For this example, I called it Property Management. Once you have named it,click save.
Creating a Toolbox in ArcGIS Pro.
Now that you have your toolbox let’s add some script tools to it!
How to create a script tool and set it up in Pro
For this example, we will set up ourcustom script tool. Using our PDF Label script which only has two parameters we can set this up quickly and run it! To add a script tool to your new toolbox, you will need to follow the steps below:
Right-click the toolboxyou just created and hover overNewandselect Script. A window will pop up.
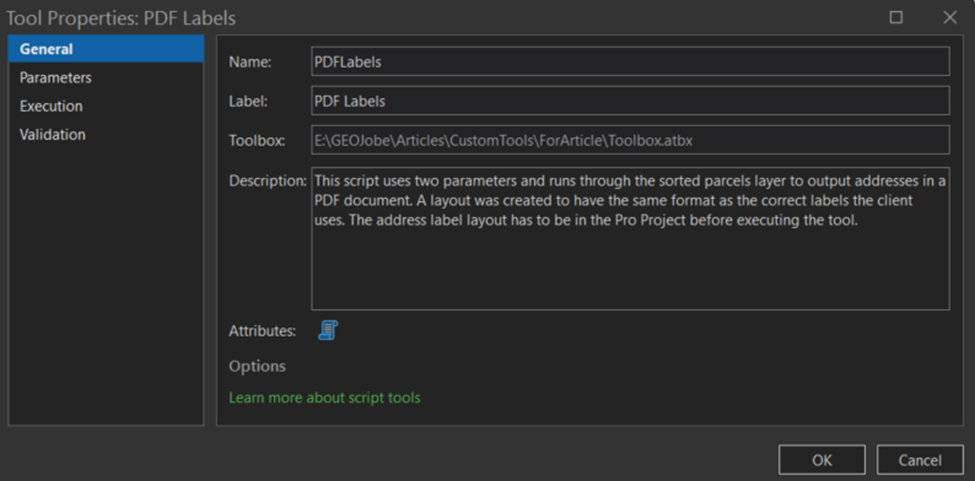
General– Here is where you will fill in the properties to name your script, label it, and give a description. The name can’t have spaces and needs to be unique to how the script functions. The Label is what the user will see listed under the toolbox in ArcGIS Pro so this is very important! You want your tool label to be short but with a great description of what the tool does. For example, mine is called PDF Labels. This is due to the tool generating address labels to a PDF format.
General tab in the Tool Properties in ArcGIS Pro.
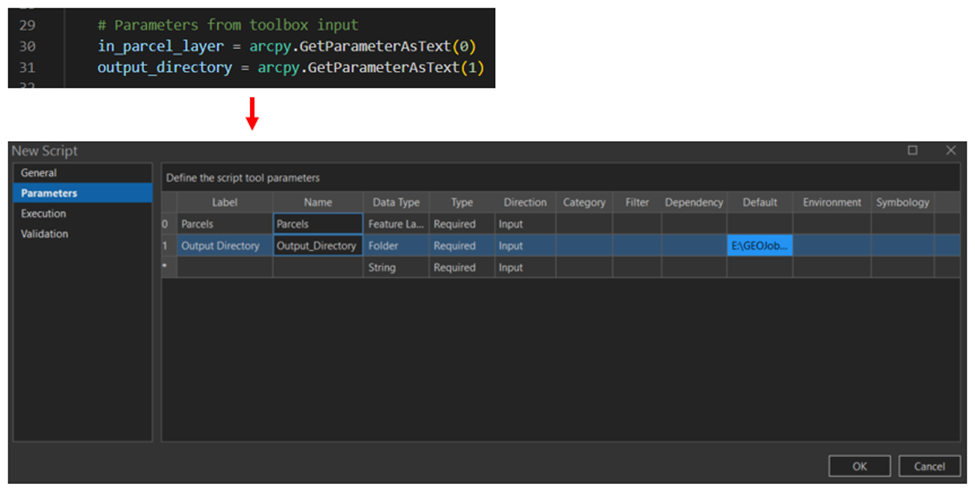
Parameters– You will take the parameters in your stand-alone script and add them to your script tool. This will give the user an interface to add the necessary layers, tables, paths, etc. for the tool to operate.
*Note: Make sure your parameter numbers in the stand-alone script and the ArcGIS Pro Script Tool match.
*Note: Make sure your parameter numbers in the stand-alone script and the ArcGIS Pro Script Tool match.
Parameters in Visual Studio and Parameters in the Script Tool in ArcGIS Pro.
If you would like more detail about each property in the parameters, go toEsri’s documentation here.
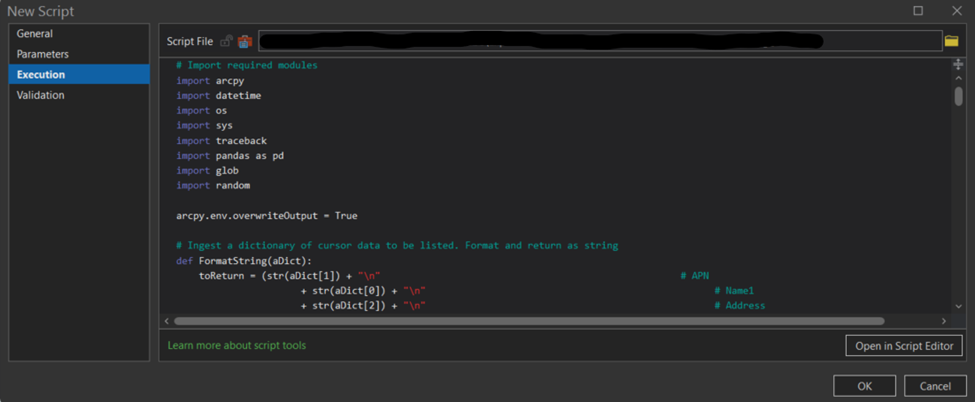
Execution– Navigate to where your stand-alone script is and add it to the Script File.
The Execution tab in the Script Tool in ArcGIS Pro.
After you have everything filled out,click OK!
How to deploy and use the script tool
Now that your new script tool has been added to your toolbox, it is ready to use! Open the tool by double-clicking it. Then fill out the parameters and click Run! In my example below, I am using a layer generated from the first tool I ran in the previous video.
The PDF Label Script Tool executed!
Custom Script Tools Changed the Game!
These custom tools save so much time when it comes to redundant workflows! Laura stated, “Using scripting tools has allowed our company to scale over 30% each year. Without these codes, Express Mapping wouldn’t have achieved this growth rate.” We have helped several clients automate their workflows, saving them time and money in the long run.
Our Services
I hope these steps have helped you set up your custom script tool or opened your eyes to all the possibilities. Do you have a workflow that you would like automated? Reach out to our team today for a free consultation, reach out viae-mailtoday! We would love to talk with you and make your life a little easier!